 I have been using AutoDesk 123D Design to create parts with. The effector and the rolling carriage were redesigned just because I wanted some CAD practice with the software and wanted some customized touches such as beveled hole entries and more mounting features. From OpenSCAD I exported the Kossel master files to an STL and then imported into SketchUp. From there I made measurements and dimensions that helped me get it into 123D Design.
I had one redesign spin (so far) on the roller because I forgot the hole for the top endstop. In all the roller turned out great. The bearings are sitting very nicely centered on the flats. The roller uses 6 - 623 bearings. Three on each side. M3 screws are used all around with the exception of the string attachment which is is and M4. The four nuts that are used to pull the two halves together are nylocks.
Once I had all three rollers assembled and installed I worked on the top part of the frame. I inserted the bearing into the line tensioners. At first it appeared to be too small to hold the bearing but I worked at it more and got it centered on the axial holes and it was fine. I inserted the plastic axel and the bearing spun freely. The tensioners and the axial were original Kossel designs.
 The rest of the top frame pieces went together without much trouble. Assembly method was similar to the bottom frame but easier since there was only a single frame to contend with. Keeping all screws about a turn from fastened so the frame pieces can move allowed for theme to come together.
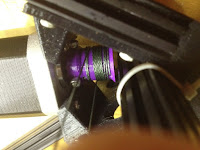
Installing the fishing line was a bit fiddley but the time I did the last one i kind of got the hang of it. I printed the clamp and followed the method described in this video.
Fishing Line Install on Rostock Kossel using Clamp
For the most part the string does well winding and unwinding neatly. I'm not quiet sure of the tension needed. For now I will not worry about it as I will turn my attention on making the rods and attaching them to the effector
Santa will be bringing a Panucatt Azteeg_X3controller. I will be using an old ATX power supply from the old McWire to power it.


No comments:
Post a Comment